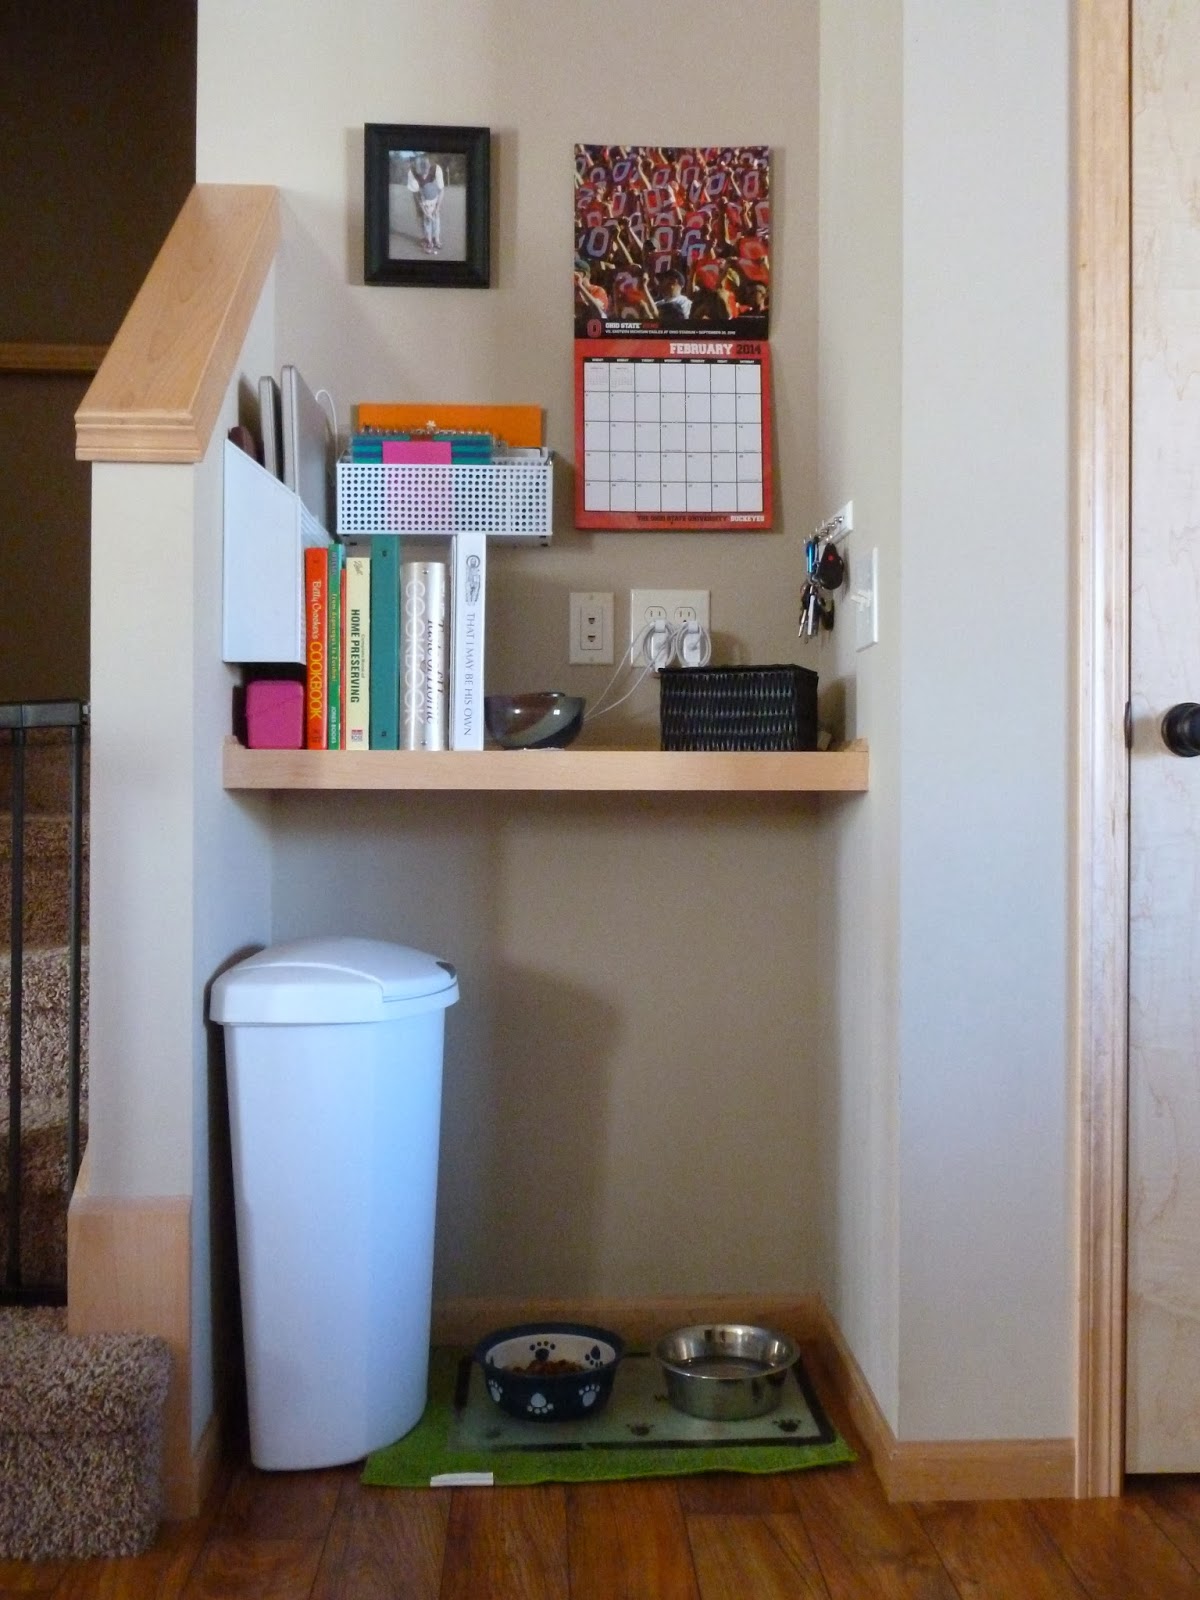
When we were purchasing our home and looking at floor plans, our builder was very proud of the fact that their floor plans were family-friendly and had areas labeled "Tech Zone" or "Prep Zone" where you could charge your devices or prep food or what-have-you.
The problem with our "Tech Zone," which is just a ledge nailed into a small recess in the wall, is that it was too small to hold our laptops and in a very random place. In our open-floor-plan, it's between the basement door and the stairs. We store Rufus's food and water under the little ledge and anything that was in our way on our kitchen island was deposited in our "Tech Zone." So, in all reality, it became a "Random Clutter Zone" with coupons, cookbooks, wallets, glasses, cameras, chargers, spare change, keys, Kleenex. Ugh! It was a mess. (I do consider us blessed to have the shelf already built - some people have to DIY those shelves and ours matches the rest of the trim in the house. So I won't complain about it.)
So I pinned a ton of command centers and we went to work.
To start off, we had to clear off everything. Except my iPad. And the chargers.
Next step? Raid Target. We had an idea of what we wanted to with our laptops. We wanted to store them upright so we could charge them and they wouldn't take up all the room on the ledge. We scoured Amazon.com and office supply store websites. But everyone knows that Target is pretty much awesome, so that's where we ended up. I think we spent around $35 total.
We really lucked out with these file holders. They have holes, presumably to look stylish and sophisticated, that happen to also be the perfect size for screws!
We planned where we wanted everything to go and Andy started drilling and hanging.
I don't think there was a single Pinterest command center that I wanted to duplicate. Every home has different clutter and I think it helps to plan your command center around your clutter. Ours was laptops, papers and coupons.
I'm going to expand on this later by getting a corkboard to hang above the keys and I want to put a dry-erase board on the other side of the stairs so I can write messages and Andy can write "Poop."
Eventually we'll get around to the closet by the front door and our mudroom/laundry room. :)
A little bit of everything - crafts, food, kid stuff, stories, pictures of my dog, pictures of my family, things I think about life. You know. Bloggy stuff.
Saturday, February 22, 2014
Monday, February 3, 2014
DIY Canvas Quotes
I love the quotes on canvas that you see on etsy and pinterest all the time. The problem is I'm too much of a DIY-er to buy them (I know, I know, it supports small businesses).
It was about as time-consuming as I expected (probably about 2 hours per sign).
1) Use a nifty font website to create your template. I used Dafont.com and downloaded a bunch of fonts and made my templates in Word.
2) Once you get them juuuuust right, print them off. On the back side (the side that doesn't have the font), shade behind all of the words with pencil. You'll be making a transfer. Looking back, I should have tried using white colored pencil for the transfers I was planning on doing on the green canvases. I could barely make out the pencil.
3) Paint your canvases.
4) I put a book under my canvases during the transfer so that my pencil wouldn't stretch the canvases or leave dents (Game of Thrones is both a good read and a good crafting tool) and traced the letters, pressing down hard, to transfer the lead from the back side of the paper onto the canvas.
5) I used Sharpies to fill in the letters I traced. It was much easier than paint and I had more control. I used silver and gold markers on the green and red canvases. It was pretty easy to tackle a canvas or two while Bubby was napping.
6) Voila!
It was about as time-consuming as I expected (probably about 2 hours per sign).
1) Use a nifty font website to create your template. I used Dafont.com and downloaded a bunch of fonts and made my templates in Word.
2) Once you get them juuuuust right, print them off. On the back side (the side that doesn't have the font), shade behind all of the words with pencil. You'll be making a transfer. Looking back, I should have tried using white colored pencil for the transfers I was planning on doing on the green canvases. I could barely make out the pencil.
3) Paint your canvases.
4) I put a book under my canvases during the transfer so that my pencil wouldn't stretch the canvases or leave dents (Game of Thrones is both a good read and a good crafting tool) and traced the letters, pressing down hard, to transfer the lead from the back side of the paper onto the canvas.
5) I used Sharpies to fill in the letters I traced. It was much easier than paint and I had more control. I used silver and gold markers on the green and red canvases. It was pretty easy to tackle a canvas or two while Bubby was napping.
6) Voila!
Friday, January 17, 2014
Travel with a toddler...in a car...for 10 hours...WHAAAAAAAAT?!
When Andy and I decided to travel back to Andy's home town for Christmas, I tried my best to not freak out. I'd traveled with a toddler in a car before. My little brother was 13 years younger than me and my family went on vacation every year. As the oldest, I got "Bobby Duty" and sat next to an 18-month-old for 2 days on our trip out west. I don't remember much of it, which means I probably blocked the experience from my mind. (Okay, I remember a few things, like playing "Bunny foo foo" for hours on end).
We scoured Pinterest for ideas for traveling with a toddler (which ended in many debates - travel at night or during the day? Who sits in the back?)
1. Travel day or night? We traveled during the day. Bubby loves to scoot around his crib at night and I was pretty sure that he would wake up at least once an hour crying, which totally negated Andy's argument that one of us could sleep while the other person drove. It would also make the first day there no fun. We would either be cranky or sleeping. So I...ahem, daytime traveling, won.
2. Seating arrangements? Most of what we read recommended that someone sit in the back, which was a lifesaver unless we were on bumpy freeways and I got carsick. I could trade out Bubby's toys with new ones, rescue ones that fell outside his reach, give him food, water, etc.
3. Speaking of...food? We packed the pouches, which Bubby loves. We also packed some Gerber Graduates cheese puff things, Puffs, cheese chunks and a cheese, ham and tortilla rollup for lunch.
4. Stopping? Probably one of the biggest lifesavers was using night time diapers. Bubby stayed dry the whole trip, which was remarkable considering one of the things he liked to do was drink water because the sippy cup made a whistling noise. We took breaks whenever I felt Bubby needed one, which ended up being about every 3 hours.
5. Entertainment? We raided the dollar section at Target (Bubby picked out a few dog toys - no surprise there - and we got some stickers, an empty lotion bottle, and a few board books) and I put a bunch of his favorite toys in a tub with a lid. It took every ounce of self control to not get out all of his new fun toys right away, but I managed. I waited until he fussed about whatever toy he was playing with before I swapped it out. Hayden LOVES lids on containers, so the biggest entertainers were the lotion bottle and a water bottle I brought. Some other ideas from pinterest that didn't really interest Bubby were magnets on a small cookie sheet and a doodlepad. Kids can be entertained by the strangest things sometimes...like headbands.
6. Naptime? I pretty much broke into a cold sweat when I thought about interfering with Bubby's nap schedule. Nap time for toddlers=sanity time for parents. Luckily, I brought along painter's tape and a light blanket to hang up over the window to help him sleep better. The tape doubled as an entertainment source and the blanket doubled as a bib when Andy forgot to pack paper towels.
Considering Bubby made it 10.5 hours without crying, each way, I considered it a great success! No diaper rash. No frazzled momma. No cranky baby.
Safe travels!
6. Naptime? I pretty much broke into a cold sweat when I thought about interfering with Bubby's nap schedule. Nap time for toddlers=sanity time for parents. Luckily, I brought along painter's tape and a light blanket to hang up over the window to help him sleep better. The tape doubled as an entertainment source and the blanket doubled as a bib when Andy forgot to pack paper towels.
Considering Bubby made it 10.5 hours without crying, each way, I considered it a great success! No diaper rash. No frazzled momma. No cranky baby.
Safe travels!
Wednesday, December 11, 2013
Why salt dough ornaments are a tease (and other Christmas happenings)
Pinterest was going overboard with all of the cute salt dough recipes and ornaments on all kinds of pages (Holiday, Kids, DIY, EVERYWHERE!)
It was so easy, the pins promised. It was so cheap, the pins promised. It was so cute, the pins promised.
Bait taken.
Cheap? Sure, when you have most of the supplies on hand.
Cute? The jury's still out.
Easy? I almost abandoned this project three times. It was almost a pinterest fail.
Ingredients:
1 cup flour
1/2 cup salt
1/2 cup water
Mix all ingredients together.
Knead until a ball of dough forms. Bubby played with it for about two minutes before he got bored with dropping pieces of it onto the floor. (I must remember that he is only 15 months old, which means a two-minute attention span is actually an accomplishment.)
Save dough in container for about three days until you summon enough courage to press a toddler's foot into it.
Form two balls out of dough. Pick pieces of dog fur out of dough ball. Press flat.
Press screaming toddler's foot into flattened dough.
Repeat. Give toddler iPhone for two minutes as a thank you.
Poke holes in the top (mechanical pencils without the lead pushed out work nicely).
(There are no pictures of these processes)
Let dry.
For two weeks.
None of the sites I checked mentioned anything about taking two weeks to dry. I set them on a cooling rack. I set them on waxed paper. I flipped them over (and prayed that the footprint would be preserved). I contemplated baking them, but didn't really feel like running my oven at 175 degrees for over an hour for two piddly salt dough ornaments.
On the second day of the drying process, the footprint flattened out and I thought all was lost. However, DO NOT ABANDON HOPE! The footprint will flatten out and then the rest will flatten and you'll be okay.
I finally got around to painting them.
And the painting experience was horrible. Maybe I set my expectations too high. I'm used to painting things like canvas or paper or rocks. Things that are not highly water soluble.
I couldn't figure out why my paint wasn't sticking if I brushed over it more than twice and then I realized that the dough had become wet and softened and was getting all gummy again.
When you paint these buggers, make sure you glob on the paint and dab rather than swipe. Also, don't go over an area more than once.
It dried pretty quickly, and it's kind of a success. One definitely looks better than the other. I think they are very third-grade-holiday-craft-from-art-class-ish. But I like 'em!
String ribbon through the hole and hang on the tree. We aren't cutting a tree this year since we'll be out of town, but you can use your imagination.
We also took our family photo. I was tempted to make it all Pinterest-y, but that's not really our family. We aren't always coordinated and matchy. We aren't always smiley. Rufus jumped into and out of about six takes. Sparkles don't fly in the air around us. There is no bokeh. No cute chalkboard signs.
So this year, it's a good ol' selfie.
My favorites:
The one we are going with:
It was so easy, the pins promised. It was so cheap, the pins promised. It was so cute, the pins promised.
Bait taken.
Cheap? Sure, when you have most of the supplies on hand.
Cute? The jury's still out.
Easy? I almost abandoned this project three times. It was almost a pinterest fail.
Ingredients:
1 cup flour
1/2 cup salt
1/2 cup water
Mix all ingredients together.
Easy! Especially when Bubby is helping "cook."
Knead until a ball of dough forms. Bubby played with it for about two minutes before he got bored with dropping pieces of it onto the floor. (I must remember that he is only 15 months old, which means a two-minute attention span is actually an accomplishment.)
Save dough in container for about three days until you summon enough courage to press a toddler's foot into it.
Form two balls out of dough. Pick pieces of dog fur out of dough ball. Press flat.
Press screaming toddler's foot into flattened dough.
Repeat. Give toddler iPhone for two minutes as a thank you.
Poke holes in the top (mechanical pencils without the lead pushed out work nicely).
(There are no pictures of these processes)
Let dry.
For two weeks.
None of the sites I checked mentioned anything about taking two weeks to dry. I set them on a cooling rack. I set them on waxed paper. I flipped them over (and prayed that the footprint would be preserved). I contemplated baking them, but didn't really feel like running my oven at 175 degrees for over an hour for two piddly salt dough ornaments.
On the second day of the drying process, the footprint flattened out and I thought all was lost. However, DO NOT ABANDON HOPE! The footprint will flatten out and then the rest will flatten and you'll be okay.
I finally got around to painting them.
And the painting experience was horrible. Maybe I set my expectations too high. I'm used to painting things like canvas or paper or rocks. Things that are not highly water soluble.
I couldn't figure out why my paint wasn't sticking if I brushed over it more than twice and then I realized that the dough had become wet and softened and was getting all gummy again.
When you paint these buggers, make sure you glob on the paint and dab rather than swipe. Also, don't go over an area more than once.
It dried pretty quickly, and it's kind of a success. One definitely looks better than the other. I think they are very third-grade-holiday-craft-from-art-class-ish. But I like 'em!
String ribbon through the hole and hang on the tree. We aren't cutting a tree this year since we'll be out of town, but you can use your imagination.
We also took our family photo. I was tempted to make it all Pinterest-y, but that's not really our family. We aren't always coordinated and matchy. We aren't always smiley. Rufus jumped into and out of about six takes. Sparkles don't fly in the air around us. There is no bokeh. No cute chalkboard signs.
So this year, it's a good ol' selfie.
My favorites:
The one we are going with:
Labels:
Andy,
crafts,
DIY,
Dogs,
Hayden,
Madison,
Momma power,
photographs,
Rufus
Saturday, November 9, 2013
DIY Tied Wreath
Our neighbor is a Michigan fan, and every year, he hangs a flag off his front door (and every year, Andy crosses the street to go around his house on our walks). Our neighbor is probably pretty nice (we don't know him very well), but football rivalry blood runs deep in my husband's veins, so sometimes, he takes drastic measures. To show our Buckeye pride, I wanted to make a Buckeye wreath. Normally, Pinterest is my go-to DIY site. However, all of my wreath pins led to Etsy sites where I could buy a wreath for $XX plus shipping, or were dead ends (Oh, 404 Error, how I loathe thee!).
Fine. If Pinterest wasn't going to play nice, I'd wing it.
Ingredients:
3 yds of fabric, your choice of colors. I went with red, dark grey, and light grey
1 foam wreath form
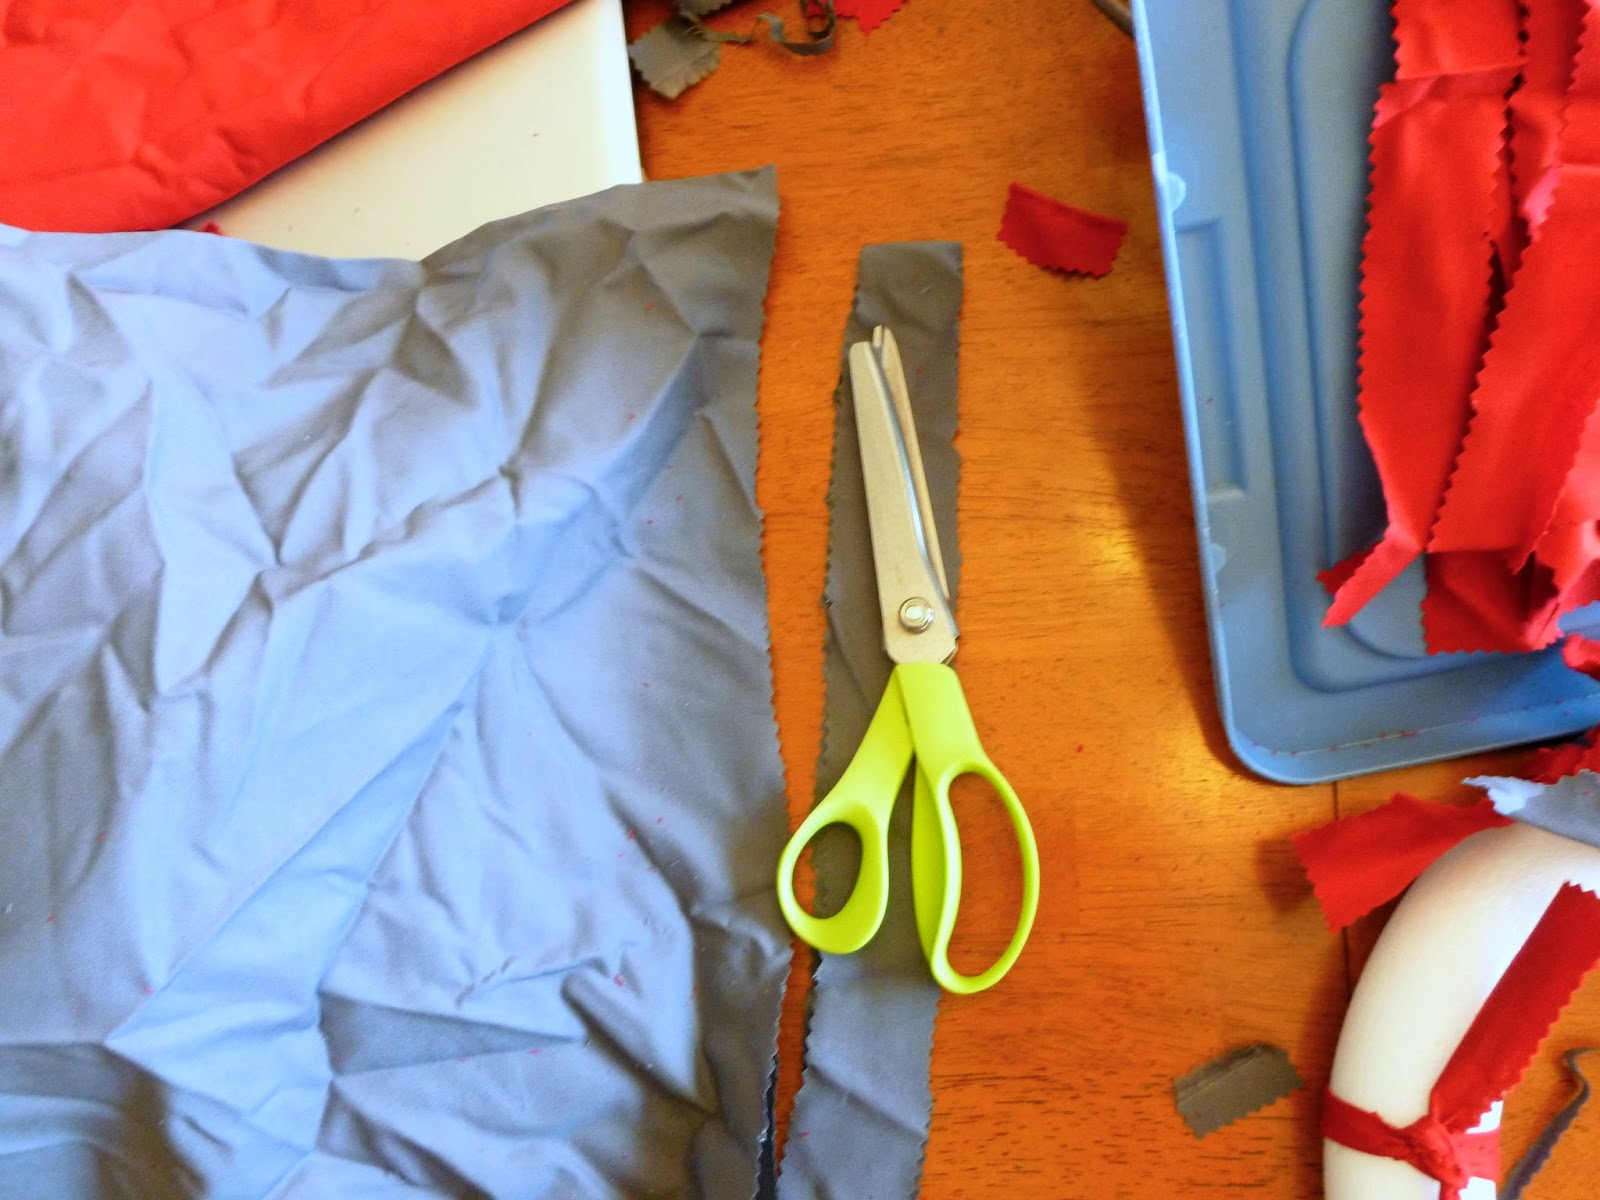
pinking shears
swag
1) I'm not big measure-r, so I just started cutting approximately 1-2" strips of fabric and eyeballed the length. I wrapped the first one I cut around the wreath to see what it would look like. Cut to your desired length.
2) Tie strips around wreath form however you want. I'm a bit OCD about patterns, so I went red, light, dark. I thought about doing "rows" of colors, but Andy liked them all mixed together.
3) You can have the knots point any direction you want for different effects.
4) I added my Buckeye necklace to the wreath and attached them. (I also bought wooden letters O,S, and U, but thought they took up too much room.)
Fine. If Pinterest wasn't going to play nice, I'd wing it.
Ingredients:
3 yds of fabric, your choice of colors. I went with red, dark grey, and light grey
1 foam wreath form
pinking shears
swag
1) I'm not big measure-r, so I just started cutting approximately 1-2" strips of fabric and eyeballed the length. I wrapped the first one I cut around the wreath to see what it would look like. Cut to your desired length.
(I'm a naughty crafter and didn't even iron the fabric)
2) Tie strips around wreath form however you want. I'm a bit OCD about patterns, so I went red, light, dark. I thought about doing "rows" of colors, but Andy liked them all mixed together.
3) You can have the knots point any direction you want for different effects.
(Knots facing up, with a few turned back so I can glue something nifty to the corner)
(Knots facing out)
4) I added my Buckeye necklace to the wreath and attached them. (I also bought wooden letters O,S, and U, but thought they took up too much room.)
Tuesday, November 5, 2013
Do it!
Join a bone marrow registry (or at least think about it). (And make sure you're willing to follow through if you join!)
I just mailed my kit back Monday. Who knows - maybe I can save someone's life :)
If there is ever anyone I know whose life depended on a bone marrow transplant, I hope their match registered.
http://bethematch.org/
http://www.sambishfoundation.org/PediatricCancerFacts.aspx
I just mailed my kit back Monday. Who knows - maybe I can save someone's life :)
If there is ever anyone I know whose life depended on a bone marrow transplant, I hope their match registered.
http://bethematch.org/
http://www.sambishfoundation.org/PediatricCancerFacts.aspx
Sunday, November 3, 2013
In the Misty Morning Fog
Who knew that I'd be thinking of Van Morrison at 6:30 this morning? (Actually, it would have been 7:30 if not for Daylight Savings Time, but since babies don't usually get that memo, we were up "early.")
It had been a fairly cold night last night, and the sun was ready to start burning up the fog. It was so pretty, I grabbed my camera and took a few pics while Hayden was playing with blocks.
You can literally see the steam rising off of the fence and our neighbor's lawn.
It had been a fairly cold night last night, and the sun was ready to start burning up the fog. It was so pretty, I grabbed my camera and took a few pics while Hayden was playing with blocks.
You can literally see the steam rising off of the fence and our neighbor's lawn.
Subscribe to:
Posts (Atom)